Blog

Unit Testing with NUnit in .Net Core
By Anoop Kumar Sharma 4090 23-June-2022In this article, we will learn about Unit Testing with NUnit in .Net Core.

What is Unit Testing?
Unit testing is a type of Software Testing in which the smallest isolated individual piece of code is tested. This testing aims to validate each unit so that the software works as expected. Unit testing is done during the development phase of the software by the software developers. Tests that rely on external systems are not unit tests. Unit tests help to identify and fix the bugs in the development phase.
There are several Unit Testing frameworks available that can be used for Unit testing like MSTest, NUnit, xUnit, etc. A test suite is the collection of tests and a unit test runner is a program that verifies tests and reports the test results.
What is Test-Driven Development (TDD)?
Test-Driven Development is a development methodology in which a Test case is written before writing the actual piece of code. This methodology is also known as the “Red-Green-Refactor” approach. In this approach, First, the test case fails (red), then get the test case to Pass (Green) and then optimize the code (Refactor).
How to set up a unit test project with NUnit?
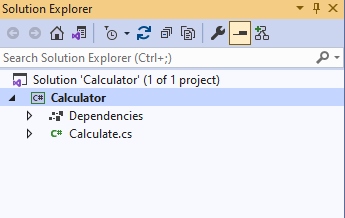
For demonstration, I am using Visual Studio 2019 and already have a class library project using .Net Core. Below is the structure of the Project.
And the code which is written in Calculate.cs is shown in the below image.
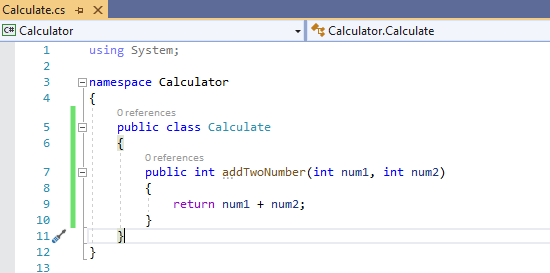
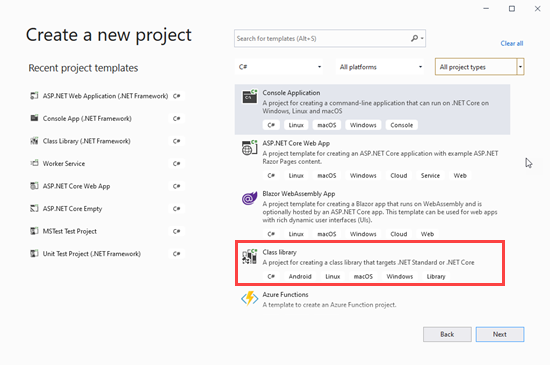
In the above code, we have a method named as addTwoNumber which will add and return the result as the response. Now let’s add a Class Library project for writing the NUnit Test cases.
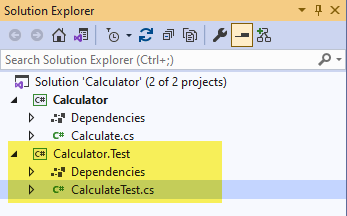
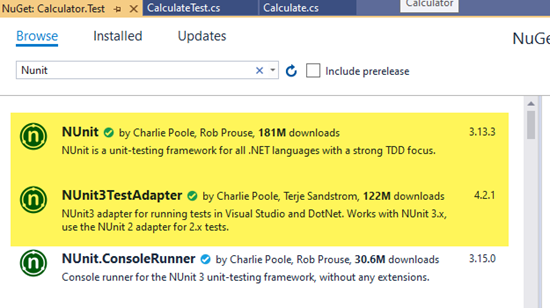
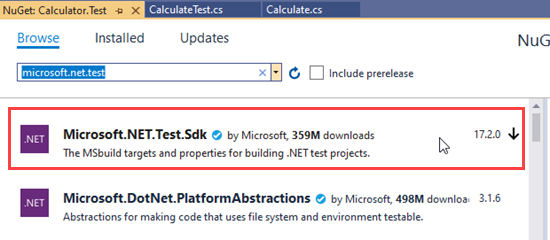
Install NUnit, NUnit3TestAdapter, and Microsoft.NET.Test.Sdk in Calculator.Test project from the Nuget Package Manager.
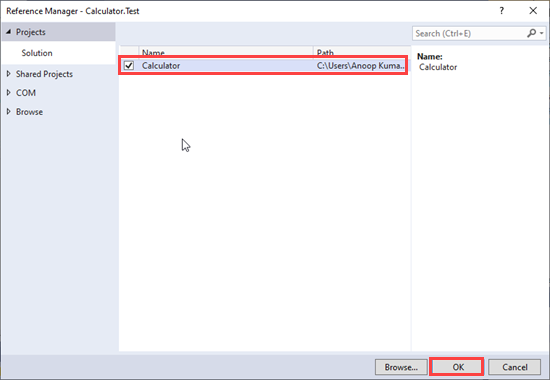
Now add the Calculator Class Library’s project reference in the Unit Test Project.
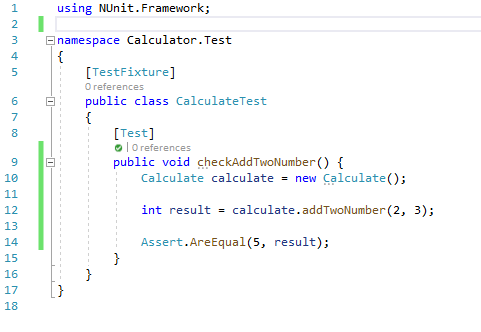
In the Unit Test project, add a class CalculateTest. Use the [TestFixture] attribute on CalculateTest class which denotes that the class contains the unit tests. [Test] attribute indicates that method is a test method. In the checkAddTwoNumber() method, I created an object of Calculate class and Assert the expected and actual value using the AreEqual() method.
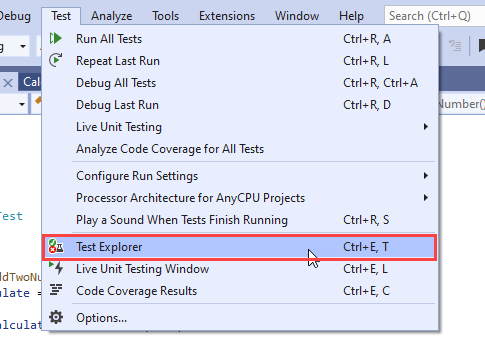
Open Test Explorer through the Test menu as shown in the below image.
In case the expected and actual values matched then the test case is passed and shown with a green tick symbol.
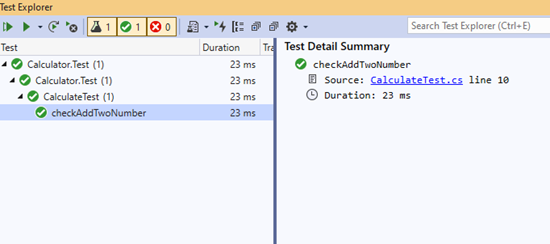
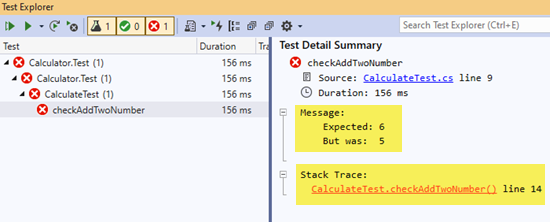
In case the test case is failed then the message and the stack trace details will help to find the issue.
