Git
Git
How to Install Git in Windows operating system
In this article, we will learn How to Install Git in Windows operating system.
Total Views: 3020
In this article, we will learn How to Install Git in Windows operating system. the installation process is very simple in windows. Visit, git-scm(https://git-scm.com/) official website in order to download the git, or You can directly search “Git” on Google Search Engine.

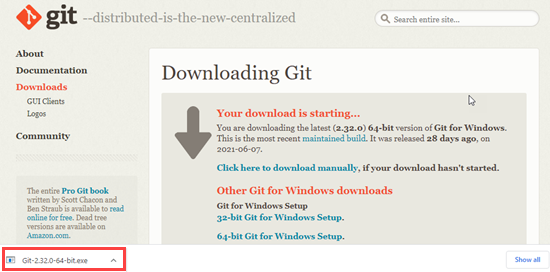
After clicking on the link as shown in the image, Git official webpage will be open.

Click on Download button 2.32.0 for windows. You can also download for Linux, Mac, etc. by clicking on the Downloads link. Once .exe is downloaded, click on the file in order to start the installation process.
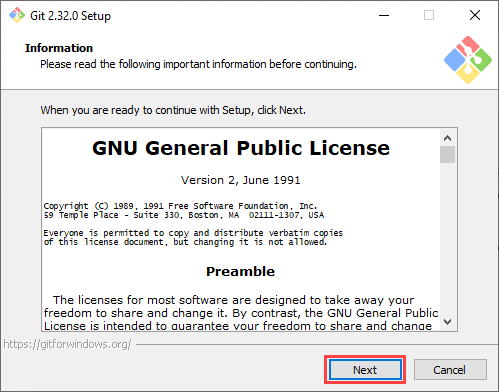
Read the license and click on the next button.
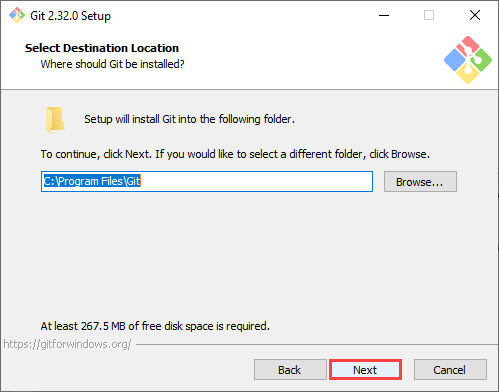
In the next step, select the destination location where you want Git to be installed.
Select the component you want to install or you can proceed with the default selected components as well. Click on next to continue.

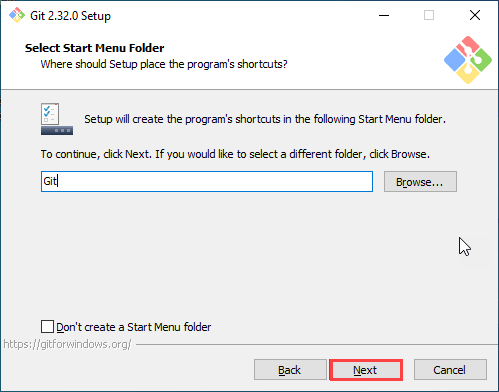
Provide the start menu folder name. Setup will create the program’s shortcut in the start menu folder. Click on next.
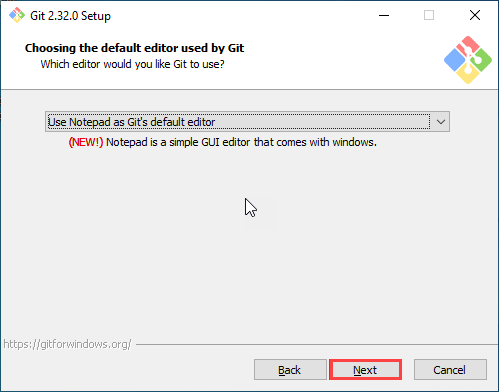
In the next step, select the default editor for Git. As I am using Windows, I have selected Notepad as Git’s default editor.
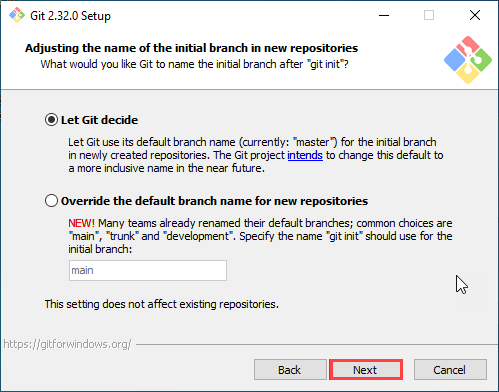
Adjust the name of the initial branch in new repositories. I have selected the “Let Git decide” default option. If you want to override the default branch name for new repositories, select the other option.
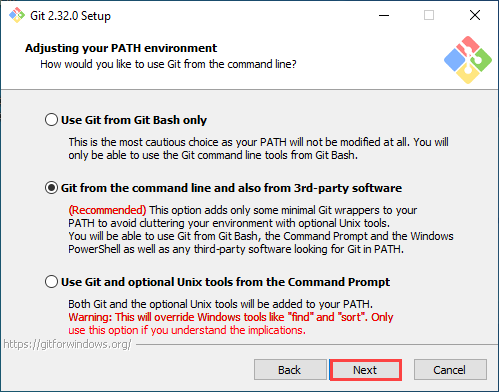
Select the “Git from the command line and also from 3rd-party software” default and recommended option.
In the next step, choose the HTTPS transport backend. I am using the default option i.e., the “Use the OpenSSL library” option.

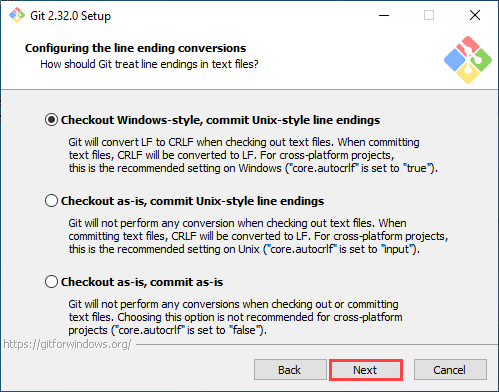
Select the “Checkout windows-style, commit Unix-style line endings” option which is the recommended setting for the windows.
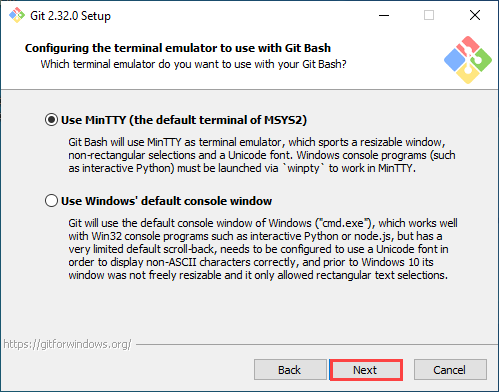
For Git Bash, select the MinTTY terminal emulator which has a useful features like a resizable window, non-rectangular selection, Unicode font, etc. Click on next.
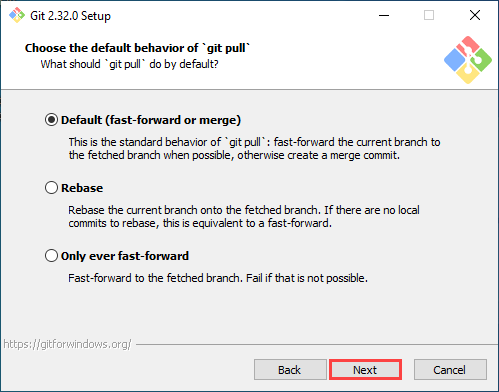
Keep Default (fast-forward or merge) option for the behavior of “git pull” command.
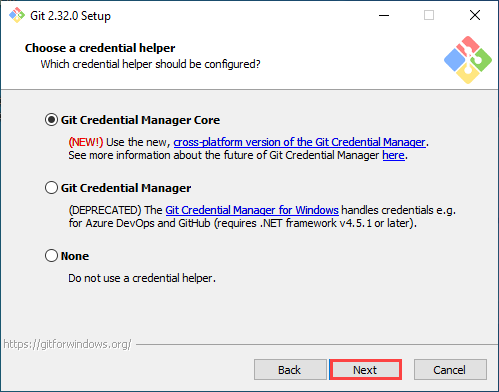
Select the Git Credential Manager Core as a credential helper.
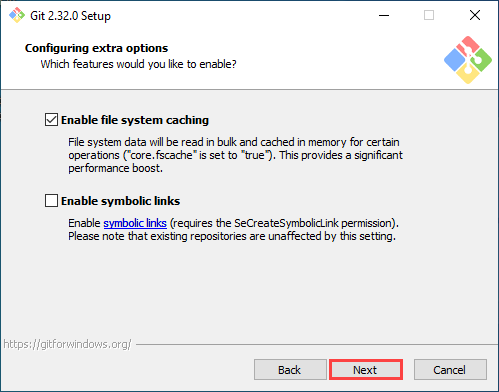
In the next step, configure the extra option as per your need.
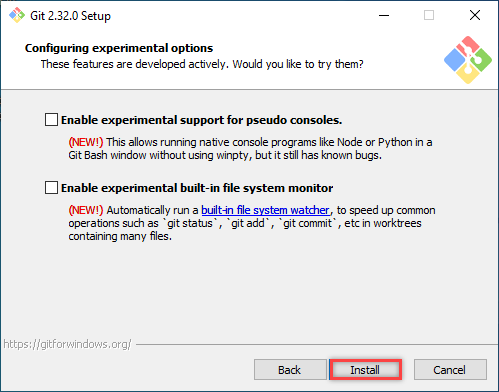
In the last step, select the experimental options. These features are developed actively. Click on the Install button.
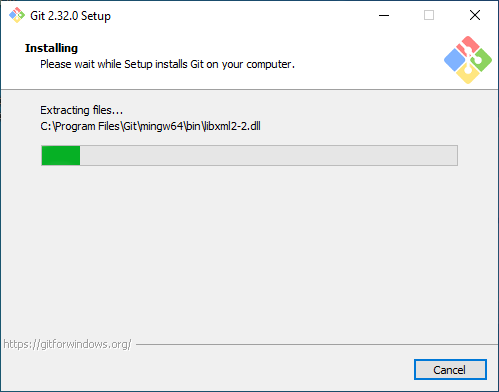
In few minutes, the setup will be installed on your computer.
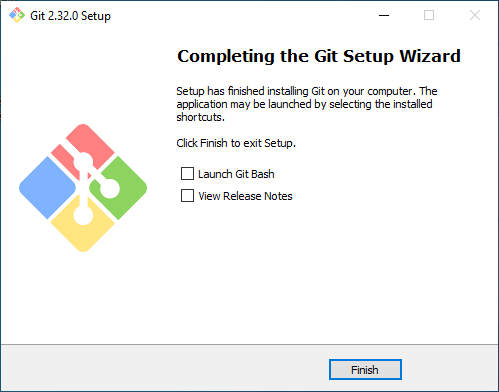
Once Git installed successfully, you will get a dialog stating about the completion of the installation wizard.
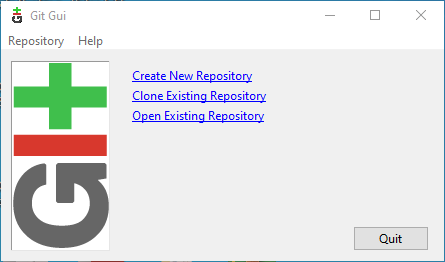
Search “Git Gui” in the start menu and click to open the Git Gui. Git Gui provides the GUI to manage the repositories.
Also, search for “Git Bash” in the start menu in order to launch the Git Command-line interface.
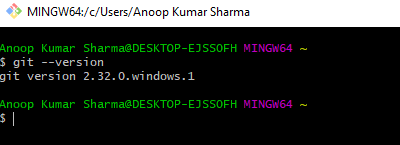
Type “git –version” in the command-line interface to check the installed version of the Git on your computer.