 Git
Git
Git Branches
In this article, we will learn about the use of Branches in Git.
Total Views: 2795
In this article, we will learn about the use of Branches in Git. The branching option is almost available in almost all popular Version Control Systems.
After going through this article, you will be able to answer the below questions:
1) How to view the list of available branches?
2) How to create a branch?
3) How to switch from one branch to another branch?
4) How to delete a branch?
5) How to do changes in the branch?
6) How to rename an existing branch?
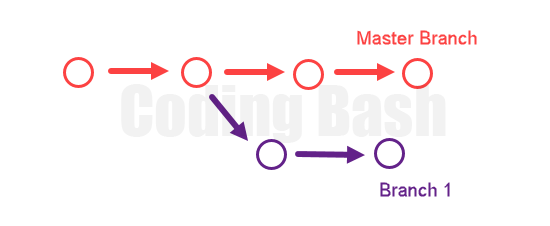
On creating a repository in the git, a default “master” branch will be added. In a repository, there can be multiple branches as per the project requirement. For example, a branch for the production which is updated from another development branch. Let say, a new functionality or task has been added and tested in the development branch. Once the functionality is ready, merge those changes from the development (or QA branch) to the production branch. Branching copies, the project from the current state (or from the stage required). A developer can do the experiments, bug fix, development, etc. in the branch. If experiments failed, then just delete the branch.
1) How to view the list of available branches?
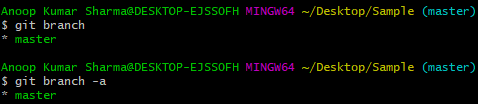
Use “git branch” in Git Bash to check the list of branches in the repository. Use “git branch -a” to view the list of the local and remote branches.
2) How to create a branch?
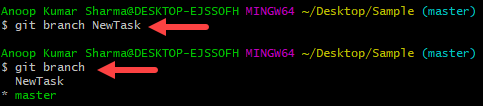
“git branch <branch_name>” is used to create the branch. In the below example, I am creating a branch named as NewTask.
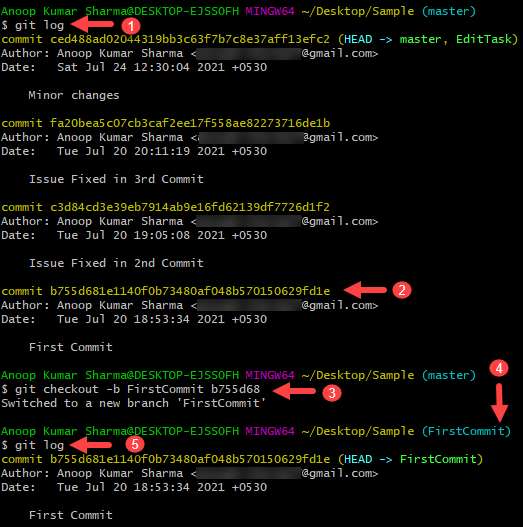
If you want to create a branch based on a certain commit, you can do so by using the “git checkout -b <branch_name> <commit_hash>” command. This command creates as well as check out the created branch. For demonstration, I picked an old commit using the “git log” command.
3) How to switch from one branch to another branch?
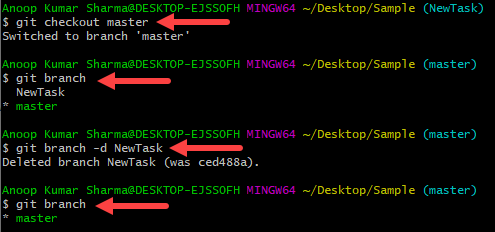
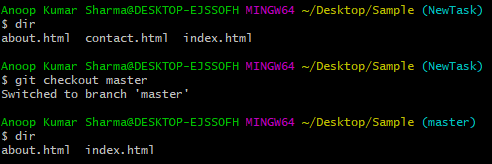
With the use of the Git checkout command, we can switch from one branch to another branch. The syntax for the command is “git checkout <branch_name>”. In the below example, we are switching from the master branch to the NewTask branch.

4) How to delete a branch?
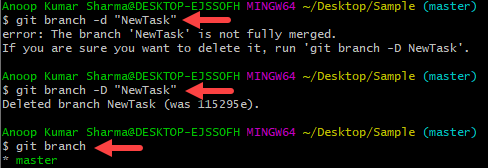
“git branch -d <branch_name>” is used to delete a branch. In the below example, we switched to the master branch then deleted the NewTask branch. Earlier there were two branches in the repository. After deleting the branch, you can verify the branch by running the “git branch” command whether the branch is deleted or not.
5) How to do changes in the branch?
It's very simple to make changes in the branch. Checkout the branch in which you want to make changes.
![]()
You can see that we have switched the branch from master to the NewTask Branch.

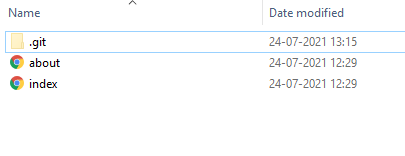
Currently, we have 2 files in the NewTask Branch.
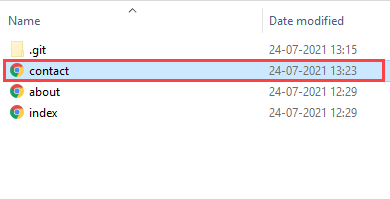
Let’s add the contact.html file in the working area of the NewTask branch.
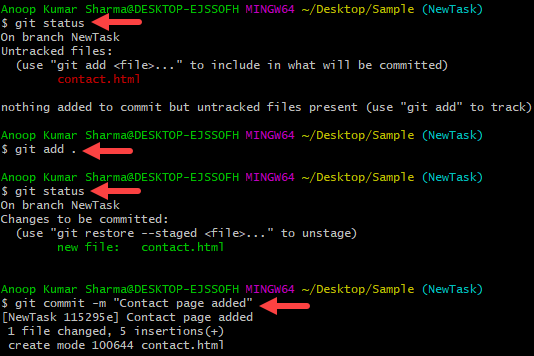
Add/Edit/Delete the files as per the need then use the “git add” command to push the changes to the staging area and “git commit” command to push the changes to the local repository branch. For demonstration, I added a contact.html file in the NewTask branch.
Now we have three files in NewTask Branch and 2 files in the master branch.
So, we have code that is not merged yet into the master branch. If we try to delete the branch with “git branch -d <branch_name>”, an error message stating that the branch is not fully merged.
The “-D” option deletes the branch even if the code is not merged or synchronized in the master branch.
6) How to rename an existing branch?
“git branch -m <old_branch_name> <new_branch_name>” is used to rename the branch. In the below example, we have renamed the branch from NewTask to EditTask.
